It is a good practice to use Google Analytics in WordPress website to track the performance. You can thoroughly analyze what is working on your site and what is not. And accordingly, you can strategize your marketing campaigns to attract potential users to your website. It allows you to optimize your website and gives a deeper understanding of your customers.
What is Google Analytics?
Google Analytics is a free tool that helps you analyze your website traffic. No matter what type of or what size of business you are having, Google Analytics provides you the required information that can help you optimize your WordPress website for better results. The detailed information like the source of traffic, the number of visitors, the most visited page of your site, and many more reports help you to enhance your marketing using Google Analytics effectively.
Benefits of Adding Google Analytics to WordPress
Google Analytics helps you make data-driven decisions. Apparently, when you have the exact statistics about your site, you can easily make your strategies. Google Analytics can help you with following things.
- The very first reason to add Google Analytics WordPress is that it’s a totally free tool. So, you don’t have to spend anything.
- It tells you the exact sources for the traffic.
- You can track at what time you are having maximum visitors on your site. Or what is the peak hours of your website.
- How do visitors find your website?
- Who is visiting your website? You can track visitors based on country or IP Address in WordPress.
- What the visitors are doing on your site?
- For how long they stay on your website and more specifically on what page?
I am sure that these are enough reasons to add Google Analytics to WordPress. This is one of the most reliable tool you can use for your site. Now that you know what Google Analytics is and what are the benefits of having it added to your WordPress website. It is the time to learn the methods to set it up.
How to Add Google Analytics to WordPress
The choice of method is entirely yours I will only show you by how many ways you can achieve this. And yes, by the end of this article, you will be fully equipped with some authentic ways to add Google Analytics WordPress successfully. So, let’s begin.
Follow these simple steps to add Google analytics to WordPress
Step 1: Create a Google Analytics Account
In order to sign up for a Google Analytics account, you are required to have a Gmail or Google account. So, if you don’t have any Google account yet please create one.
-
- Go to the Google Analytics Sign Up page and use your Gmail account to Sign Up.
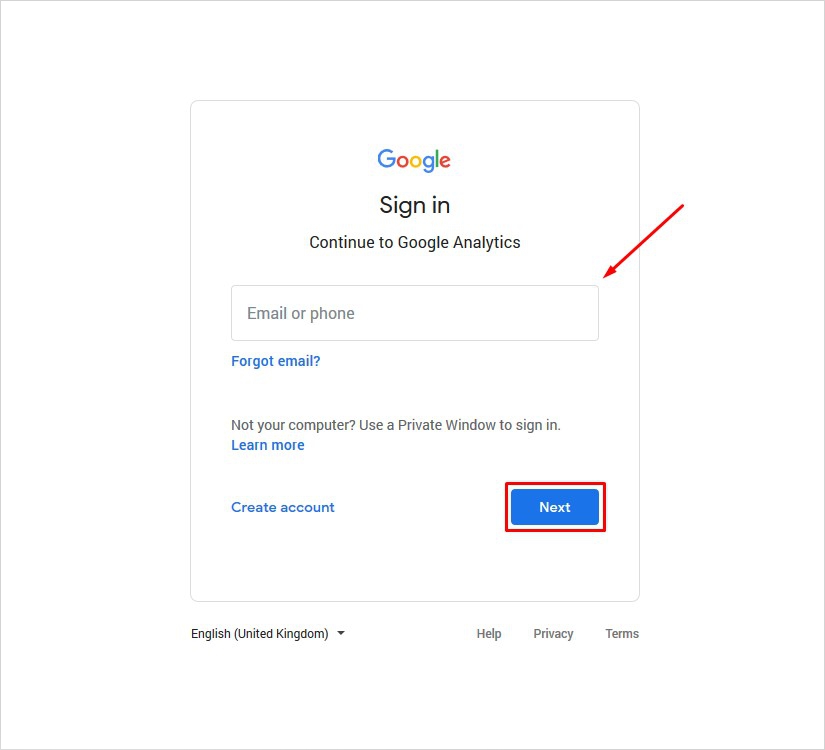
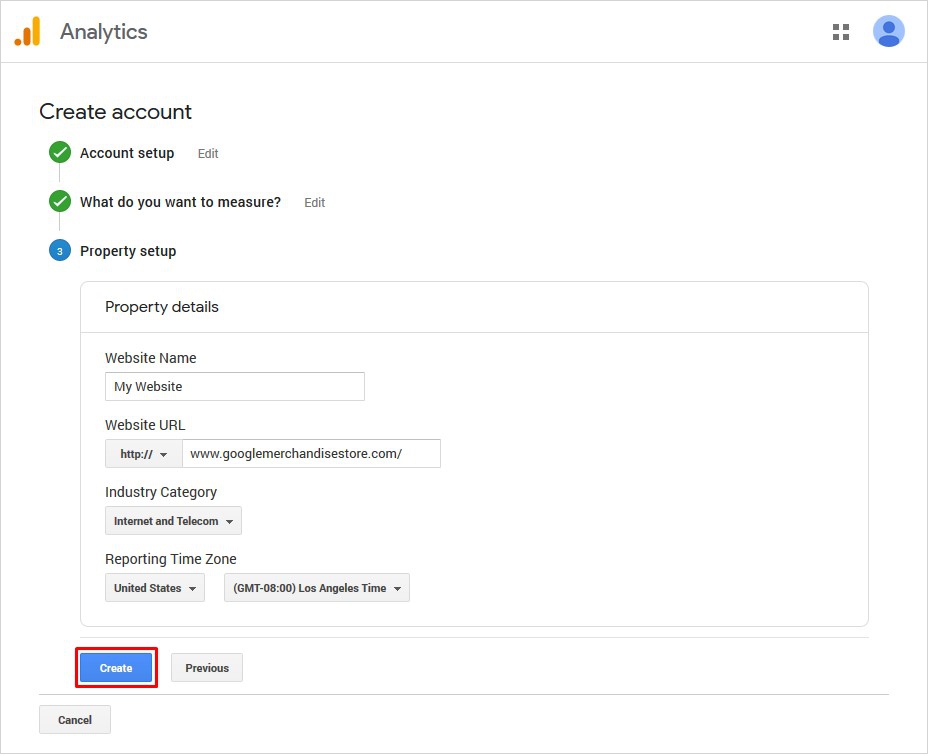
- Now, you will be taken to the account setup screen.

- Here, you are required to enter the data in the required fields such as ‘Your Account Name’ which will be your Google
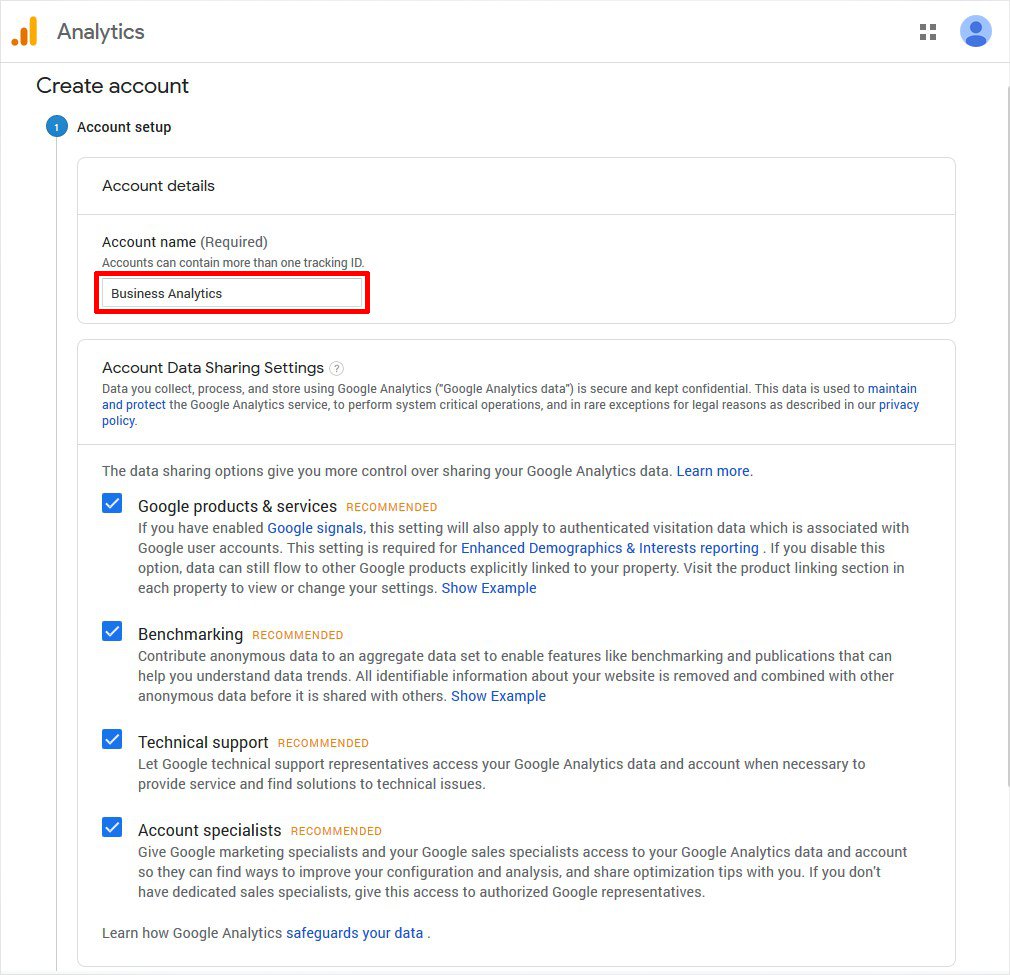
- Add analytics profile name for your website. You can use whatever name you like.
- Make sure you click on the ‘Web’ option if you want to track your website. However, an option for ‘Mobile App’ is also there.
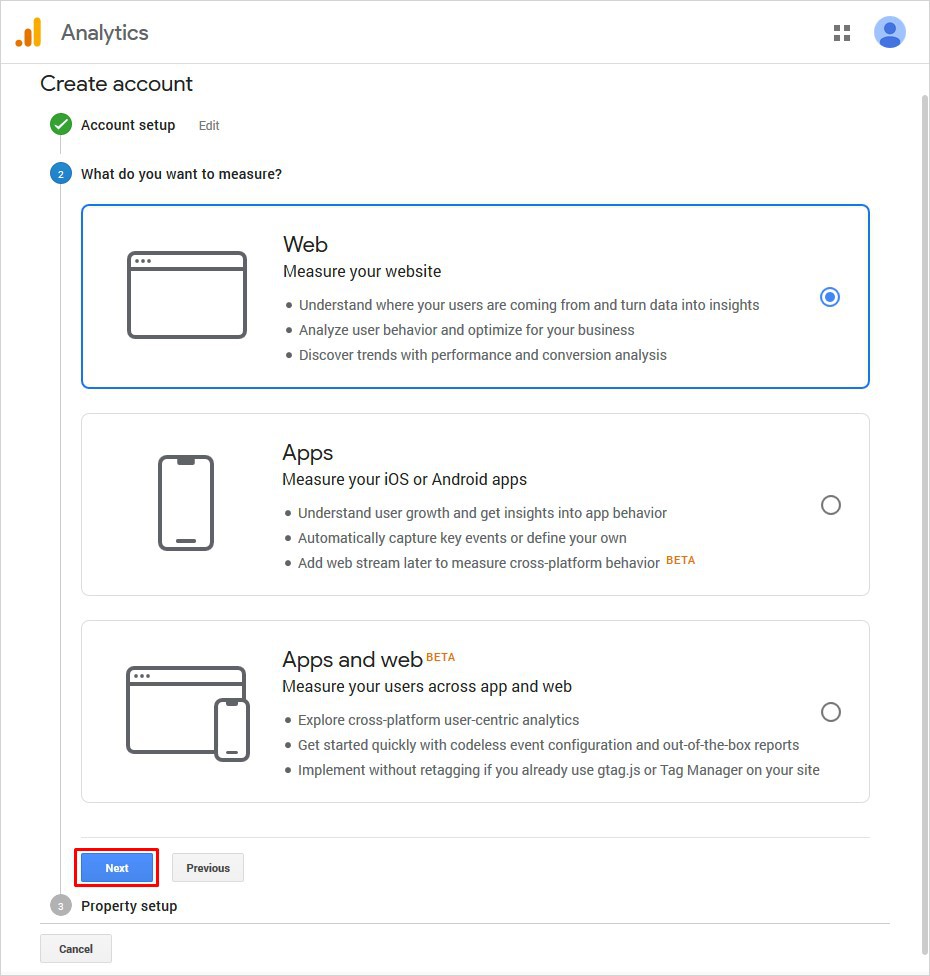
- You can track multiple websites from a single account.
- Go to the Google Analytics Sign Up page and use your Gmail account to Sign Up.
- Now, you shall see the popup window showing Terms of Service Agreement, click on ‘I Agree’ to continue.
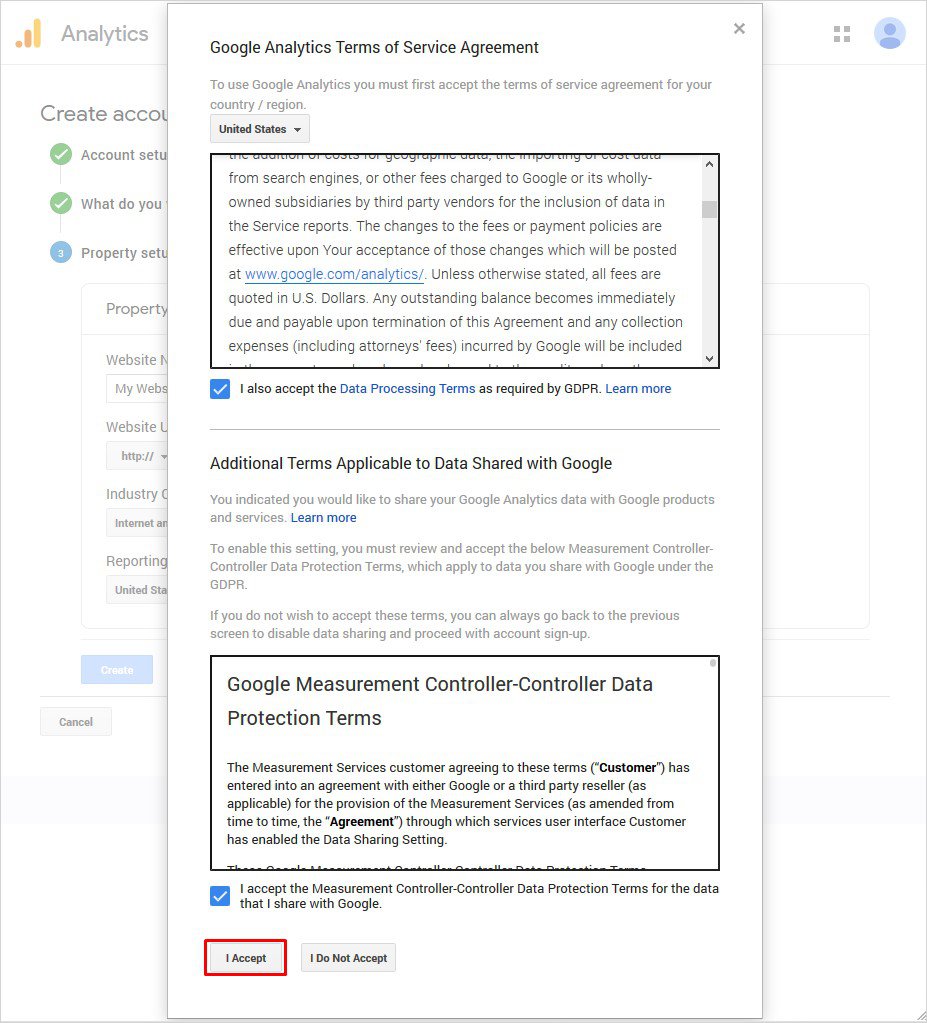
That’s it! You have successfully signed up for Google Analytics.
Step 2: Install Google Analytics WordPress
As you’ve already signed up for Google Analytics, now the next important thing is to add Google Analytics to your WordPress site. And we have several ways to add Google Analytics to WordPress and you can begin with any method you find easy and helpful according to your needs. The two methods are:
- Adding Google Analytics WordPress Using a Plugin
- Adding Google Analytics WordPress Manually
Now I’ll show you how easily you can use both methods. Let’s begin with it.
How to Add Google Analytics to WordPress Using Plugin
Using a plugin makes it incredibly easy to add Google Analytics to WordPress without the need to touch even a single line of code. It is one of the most reliable and widely used Google Analytics plugins with over 2 million active installs. I assume you know how to install a WordPress plugin. The basic version of MonsterInsights is free and it includes pretty good features. But if you want some more, you can go for Pro Version that comes with 14-days money-back guarantee.
Follow these steps to add Google Analytics using MonsterInsights Plugin
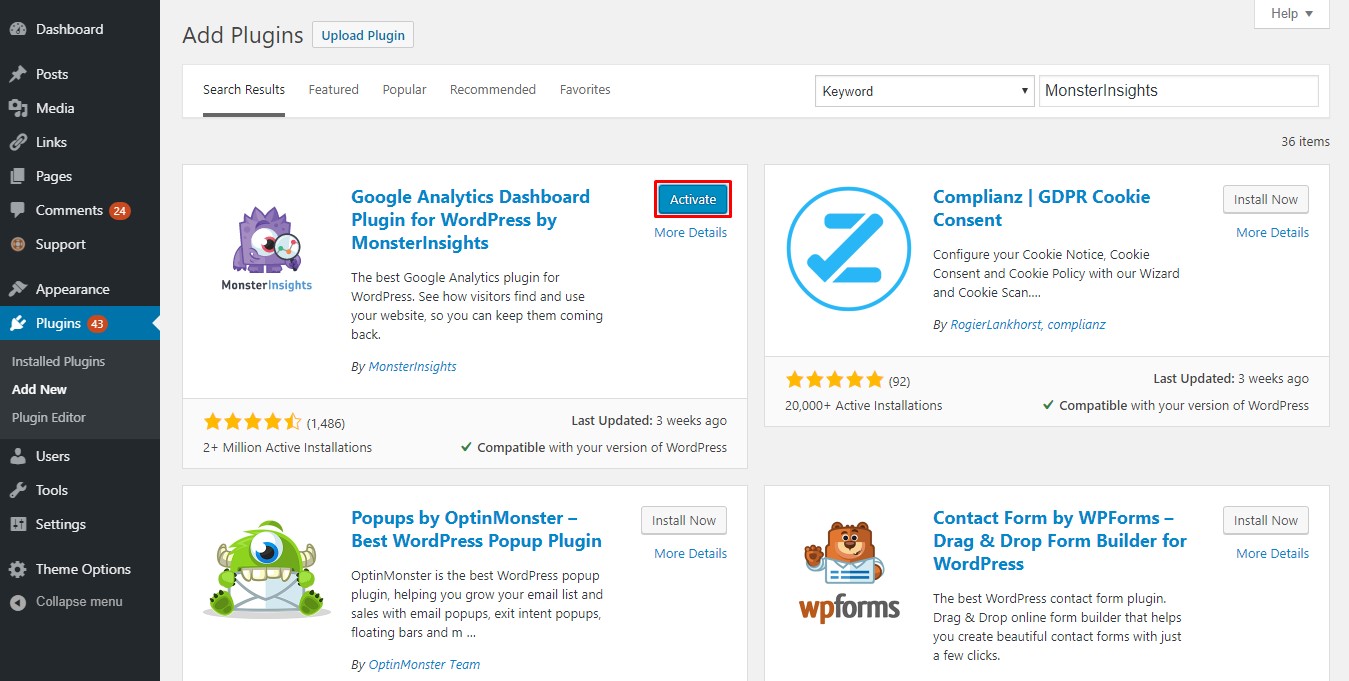
Step 1: Install the Plugin
First, you need to install the plugin. Go to your WordPress dashboard, head to the Plugins → Add New. Search for MonsterInsights plugin and click on Install Now once you see it. And finally, click on the Activate to move ahead.
Step 2: Configure the Plugin
After you have successfully installed and activated the plugin, now you need to configure it. Because once it is properly configured, you will be able to communicate with your Google Analytics account.
Go to Settings in the left menu bar and navigate to Insights → Settings to authenticate your entered Google account.
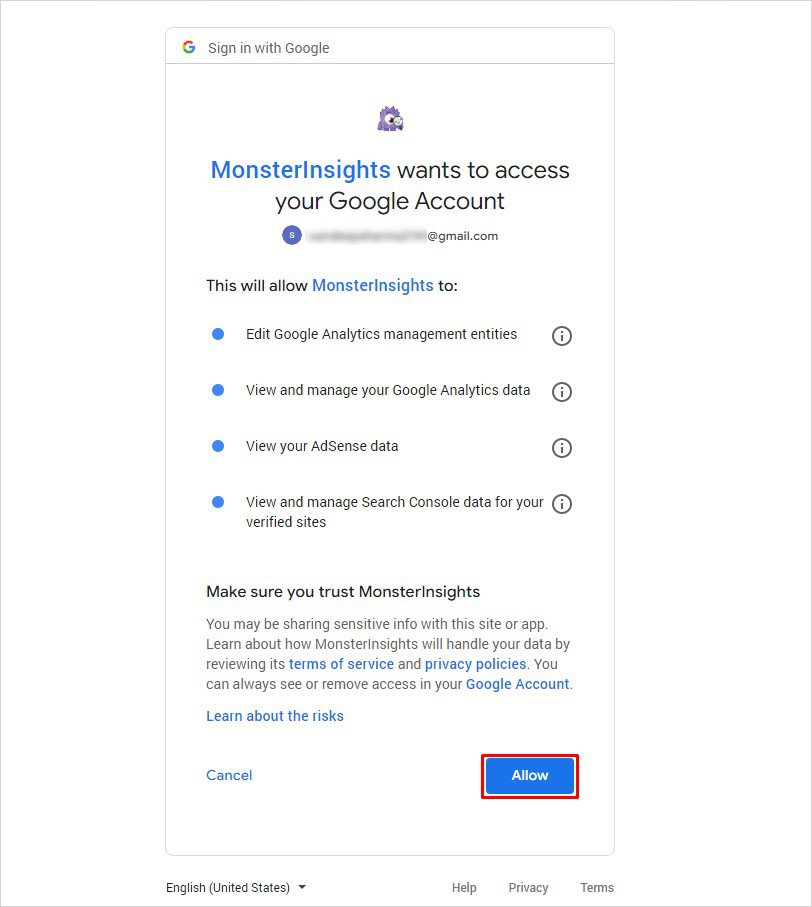
Step 3: Authenticate the Google Account
In order to authenticate your Google account click on the ‘Authenticate with your Google account’ button and you will be taken to the Google login page once again. You just have to fill the asked information and click on the ‘Next’ button to continue.

You need to ‘Allow’ MonsterInsights plugin to access your Google Analytics Dashboard and data present there. That’s it! You should now start seeing your site tracking data within 24 hours.
Some Other Popular Plugins to Add Google Analytics to WordPress
- Google Analytics Dashboard for WP by ExactMetrics (formerly GADWP)
- GA Google Analytics
- Site Kit by Google
- Google Analytics Dashboard Plugin for WordPress by Analytify
How to Add Google Analytics WordPress Manually
Manually adding Google Analytics WordPress needs some basic knowledge of coding. Therefore, it is suggested that advanced users who are familiar with coding should go for this method. Likewise, make sure you are using a child theme in WordPress to add customizations. Because if you do not use the child theme then all the changes you will make will be overwritten in the main theme as soon as you will update your theme.
Before we head towards the theme files, it is essential that we fetch the Google Analytics Tracking Code from the Google Analytics dashboard. Simply follow the below-given steps to do so.
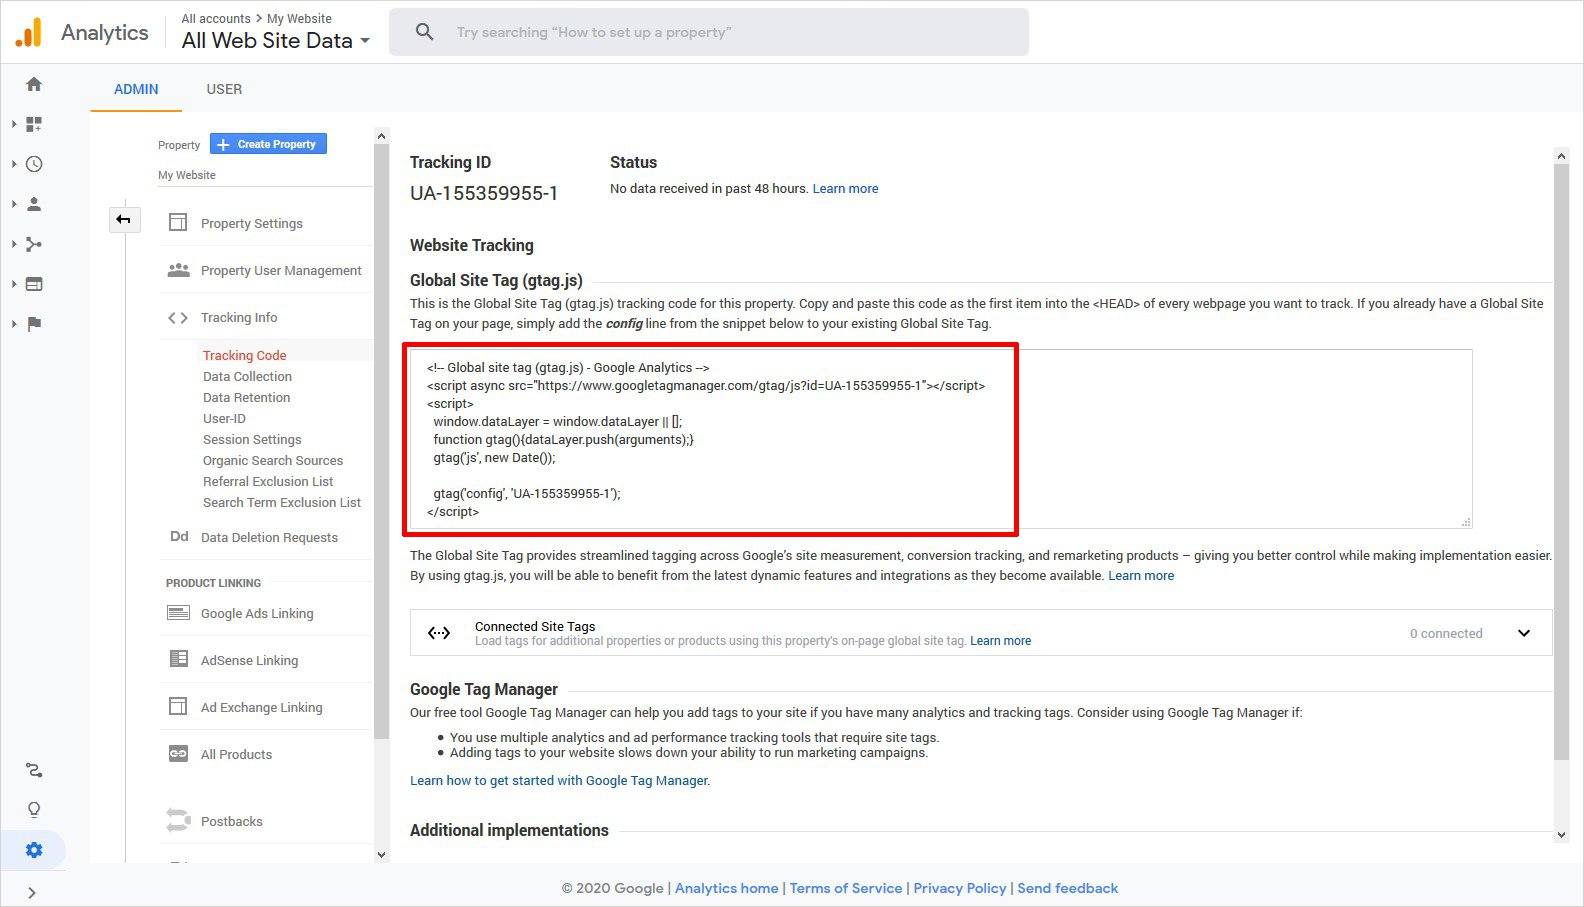
- Log in to the Google Analytics account and click on the ‘Admin’ at the left side menu bar.
- Click on the ‘Traffic Info’ and choose the ‘Tracking Code’ from the submenu here.
- You shall now be seeing the tracking ID and tracking code. Simply copy the tracking code from here.
- Now, head to the WordPress dashboard for further processing.
Add Google Analytics Code in the header.php file
The major benefit of adding the tracking code in the header.php file is that it will load on each page. So, to add the tracking code you need to follow the following steps.
- Go to the WordPress dashboard and head to Appearance → Theme Editor
- From the right column open the header.php file
- Now, before closing the </head> tag, paste the tracking code that you have copied from the Google Analytics account.
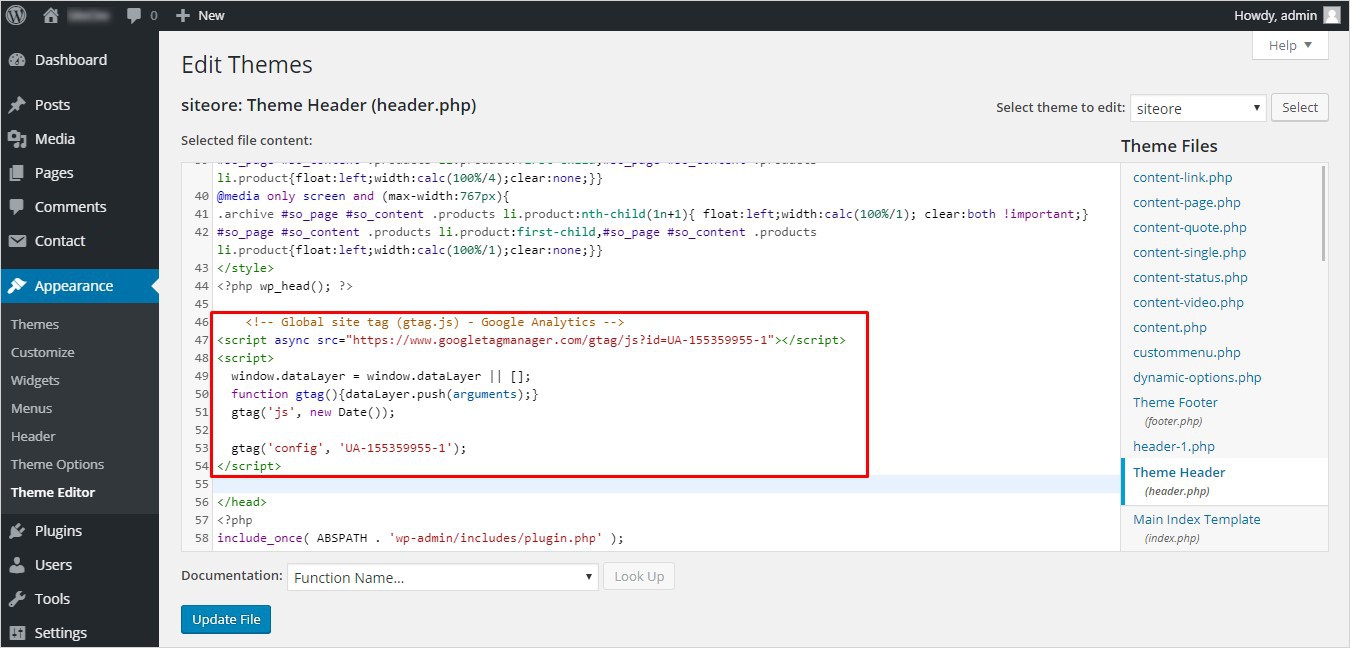
- After you paste the code click on the ‘Update File’ button to confirm.
That’s all! You’ve successfully added the Google Analytics WordPress.
Add Google Analytics Code in functions.php file
You can add the Google Analytics code in functions.php file as well. All you have to do is edit the child theme’s functions.php file and include the below-given piece of code to it. (Make sure to replace the tracking ID with your own tracking ID)
function my_google_analytics() { ?>
<script async src="https://www.googletagmanager.com/gtag/js?id=UA-181480903-1"></script>
<script>
window.dataLayer = window.dataLayer || [];
function gtag(){dataLayer.push(arguments);}
gtag('js', new Date());
gtag('config', 'UA-181480903-1');
</script>
<?php
}
add_action( 'wp_head', 'my_google_analytics', 10 );
Save the changes and you’re done.