When building a WordPress site, it’s vital that you make every attempt to make your mark. That is, you need to build a site that aligns with your personal or business goals and objectives. But it also means you need to strip away some of the generic things that come pre-packaged with WordPress comes pre-packaged.
Developers who are old hat at this stuff have an automatic laundry list of things to add and remove, barely giving their actions a second thought.
So what’s on their laundry list? What follows is a handy collection of what you can do to make your site look and function better and give off an air that you know your stuff.
1. Get Rid of “Howdy”
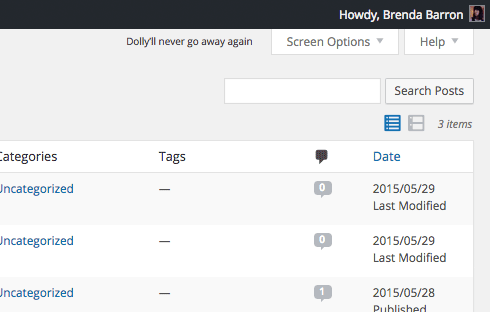
When you log into WordPress, the first thing you see is the dashboard. You’ll notice that in the upper righthand corner, it’ll say your name. But before your name, it says “Howdy.” This is just the default greeting WordPress comes with.
A code snippet can easily remove that “Howdy.”
It’s meant to be friendly. And while that works for some people, for those trying to convey a professional attitude, “Howdy” just isn’t going to cut it.
I mean, can you imagine sending a corporate client – one not familiar with WordPress – a link to your site’s dashboard and they see “Howdy, Bob!” in the corner?

They’ll probably assume you did that, which has the potential to rub some people the wrong way. Are they stodgy, stuffy people? Sure. But why hurt business relationships with something silly like this if you don’t have to? Especially when it’s so easy to remove.
To swap out the “Howdy” for something more professional, all you need to do is insert this nifty bit of code into your themes functions.php file:
| add_filter('gettext', 'change_howdy', 10, 3); | |
| function change_howdy($translated, $text, $domain) { | |
| if (!is_admin() || 'default' != $domain) | |
| return $translated; | |
| if (false !== strpos($translated, 'Howdy')) | |
| return str_replace('Howdy', 'Welcome', $translated); | |
| return $translated; | |
| } |
Remember: it’s always a good idea to create a backup of your site before tinkering with its PHP files. Or, better yet, create a child theme for making your customizations.
2. Get Rid of “Just another WordPress site”
This one’s a simple one but still important. Because I still see a lot of sites that are updated regularly and have pretty decent content that are rocking the “Just another WordPress site” tagline. That’s kind of inexcusable.

To change it, all you need to do is login to your site then click Settings > General. In the box next to Tagline remove this standard phrase and insert your own custom tagline.
Or, if you’d rather, just delete and skip the whole tagline business altogether.
Alternatively, you can edit the tagline in the Customizer panel (Appearance > Customize).
3. Clean Up Your Sidebar
WordPress supports sidebars as a part of the default installation and contained within these sidebars are usually widgets. When you install a theme that contains a blog, you’ll likely see the sidebar populated with several widgets like “Archives,” “Recent Posts,” and “Tag Cloud.” And while these can be appropriate widgets to include in some situations, they’re not a one-size-fits-all solution by far.
There are many occasions where such widgets have no place at all. So if you want to take more control over your site and its look, it’s a good idea to remove them altogether. You can do this by going to Appearance > Widgets then drag the widgets off of the widget areas on the right-hand side of the screen and drop them onto the Available Widgets section.

4. Cleanup Your Dashboard
The WordPress dashboard comes pre-stocked with a lot of information and a lot of widgets. For experienced developers, this is expected and familiar. The information presented within these widgets can be useful as they put everything you need right at your fingertips at login. However, if you’re not familiar with the ways of WordPress, all of those dash widgets can be confusing.
That’s why the real dev pros strive to eliminate as much confusion from their dashboards as possible by removing widgets that they don’t need and/or removing widgets that would just confuse their clients. Plus, a minimal dashboard just plain looks nice. I mean, you don’t really need to see the latest news from WordPress when working on a site, do you?
You can eliminate the widgets you know you’ll absolutely never want to use by adding some code to your theme’s functions.php file.
Getting rid of the “default” widgets is usually a good place to start. You and your clients likely won’t need them and they’ll get rid of some of the clutter. These widgets are called meta boxes and the defaults include things like the “browser_nag,” “right_now,” “activity,” and “quick press.” The WordPress Codex offers simple instructions for removing dashboard widgets using the remove_meta_box( ) function. But this what they look like in code:
| // Main column (left): | |
| $wp_meta_boxes['dashboard']['normal']['high']['dashboard_browser_nag'] | |
| $wp_meta_boxes['dashboard']['normal']['core']['dashboard_right_now'] | |
| $wp_meta_boxes['dashboard']['normal']['core']['dashboard_activity'] | |
| // Side Column (right): | |
| $wp_meta_boxes['dashboard']['side']['core']['dashboard_quick_press'] | |
| $wp_meta_boxes['dashboard']['side']['core']['dashboard_primary'] |
Adding code to remove widgets is great if you don’t anticipate needing to change your dashboard’s layout very often. However, if you will need to change things around a bit, or want to give your client some control over it, a plugin is your best option. But more on that in just a bit.
A part of cleaning up your dashboard involves making sure everything that you want to be visible is visible as well. For instance, if you want to provide your clients and/or users with instructions on how to post, without writing up a separate tutorial, you can do so by creating a custom widget that displays this info on the dashboard.
The procedure for doing this is similar to how you remove widgets. It involves adding a code snippet into functions.php that lays out the details for the custom dashboard widget you’d like to add. Our very own Daniel Pataki wrote up a great tutorial for how to accomplish this recently that’s well worth reading if you’re serious about dashboard customization. A basic widget will have code that looks like this:
| add_action( 'wp_dashboard_setup', 'register_my_dashboard_widget' ); | |
| function register_my_dashboard_widget() { | |
| wp_add_dashboard_widget( | |
| 'my_dashboard_widget', | |
| 'My Dashboard Widget', | |
| 'my_dashboard_widget_display' | |
| ); | |
| } | |
| function my_dashboard_widget_display() { | |
| echo 'Hello, I am Mr. Widget'; | |
| } |
The point is you can make a dashboard widget to contain whatever information you want and present in any way you want. This is great for featuring tutorial info, as I already mentioned, site credits, post category links, and so forth. Plugins can helps with this endeavor as well.
5. Add a Logo to Your Site and Your Dashboard
When you install a new theme, it’s usually a good idea to customize as much of it as you can. Once you establish some initial settings, this typically begins with adding a custom logo. This will most likely appear in the header of your site and provides a way for your visitors to instantly identify your brand. You can get to it by going to Appearance > Customize then use the theme customizer to upload your logo.
If you want to make your site’s dashboard branded as well – and remove the obligatory WordPress logo – you can do so by adding some code. This will make your dashboard look more professional and you won’t risk confusing your clients with inconsistent branding.
You can swap out the WordPress logo for one of your own choosing by inserting the following code into functions.php:
| /**REPLACE WP LOGO**/ | |
| function admin_css() { | |
| echo ''; | |
| } | |
| add_action('admin_head','admin_css'); | |
| /**END REPLACE WP LOGO**/ |
Then add this bit of code to admin.css.
| #header-logo {background-image: url(images/client_logo.jpg);} |
All you need to do is make sure the referenced logo file name is correct. Pretty easy, right?
6. Add a favicon
A favicon is another one of those things you can change using the theme customizer but you’d be surprised by how many people forget to do so. In case you didn’t know, a favicon is the little picture that appears next to your site’s URL in the browser window. It’s another opportunity to offer brand continuity and show you pay attention to the details—the latter of which is something professional developers definitely do.
Adding a favicon is simple. Just go to Appearance > Customize then upload your favicon in the theme customizer. If you’re not sure how to make a favicon, however, there are tools for that as well. Favicon by RealFaviconGenerator is a good choice as is Heroic Favicon Generator.
7. Customize Your Permalinks
Another thing you can add to your site to make it look more professional is custom permalinks. When you first install a WordPress theme, the permalinks are set to a string of numbers by default. This isn’t very attractive and it also does nothing for your search engine rank. Leaving your permalinks set to the defaults is basically a wasted opportunity. Plus that numeric string looks sloppy and sort of spammy.
But not to worry, this is an easy fix. Just go to Settings > Permalinks on the dashboard and change it from the number format to post name. This way, each post will be saved with a slug that reflects the title of your post or page rather than just unidentifiable numbers.
8. Get Rid of Hello Dolly
It’s been a part of WordPress from the very beginning, but it’s not exactly a top priority when it comes to features. The Hello, Dolly plugin comes with WordPress by default and adds a lyric from the song “Hello, Dolly” by Louis Armstrong to the top of the dashboard over in the righthand corner.
That’s all this plugin does. And while it definitely shows that the WordPress creators have a sense of humor, it’s not exactly professional, especially if you’re developing a site for corporate types.
Getting rid of Hello, Dolly is pretty simple. Just navigate to Plugins on the dashboard and scroll down the list of installed plugins to find it.
Once you do, you can click Deactivate beneath the plugin’s name. Or if out of sight out of mind isn’t enough for you, click the checkbox next to the plugin’s name then click the drop down menu at the top of the plugin list and select Delete.
9. Add a Custom 404 Page
Another way to make a professional impression is to create a custom 404 page. Even if you do your best to make sure there aren’t any broken links on your site, you’ll still inevitably run into a visitor who types in your site’s URL wrong or who accesses your site through an outdated search engine result. To ensure these dead ends aren’t actually dead ends, you need to create a 404 page that helps direct wayward visitors back to where you want them.
Now, most themes come with a default 404 page but it typically just tells the visitor they’ve landed on a page that doesn’t exist. It might offer a link back to the homepage but that’s typically it. This isn’t very helpful. I mean, the visitor landed on a page that doesn’t exist, but might there be a page on your site that matches what they’re looking for?

You don’t have to build a custom 404 page from scratch, thankfully. There are plugins that can accomplish this for you. 404page and 404 Page by SeedProd are both good choices here.
10. Customize Your Footer
The footer in most themes is pretty generic. Often, this area tells you what theme the site is using, a copyright date, and the title of the site. You can change this text but it’s often more of a challenge to change the orientation of this info or add more fields.
You can get around this by using widgets. So long as the theme you select allows for the use of footer widgets, you can add some in this area to highlight additional information. A good choice is to include a custom text widget with your contact information. Or you can add your social media icons in another widget. You can also insert some of the other standard widgets in this area like recent posts or your primary navigation menu.

Of course there are some plugins that offer even more control over what appears in your footer as well. For instance, there’s Footer Putter, which allows you to add copyright and trademark info, Header and Footer for adding ad codes, and WP Custom Header Footer, for adding custom CSS and JS without touching your theme’s files.
Taking the effort to customize the footer area eliminates that new developer smell from your site and shows consistency and professionalism.
11. Use A White Label Plugin
You can use a white label plugin to customize the dashboard of your site quickly and easily without having to delve into the code. We recommend using while labeling plugin Branda. Branda is a useful plugin that makes it simple to customize the dashboard to create a more consistent brand image without having to touch any code.
With it, you can customize the login screen, footer, dashboard footer, dash widgets, and more. Branda gives you full control over the backend of your site so you can customize every detail. This is really important if you need to provide dashboard access to your clients. Your attention to detail with customization will make your brand stand out.
Wrapping Up
First impressions really are everything when it comes to your online presence. And if your website doesn’t convey a professional appearance right off the bat, you stand to lose clients or customers. Thankfully, it’s not that difficult to polish your website to look like it was built by a true pro.
By adding features—and removing others—you show you pay attention to the details. Do that on your website and visitors won’t be able to help but assume that’s your overall approach to business.